Bench weight scales calibration
Main content
- What are bench weight scales?
- Structure and operating principle
- Application
- Why should you calibrate a bench weight scale?
- Calibration procedure
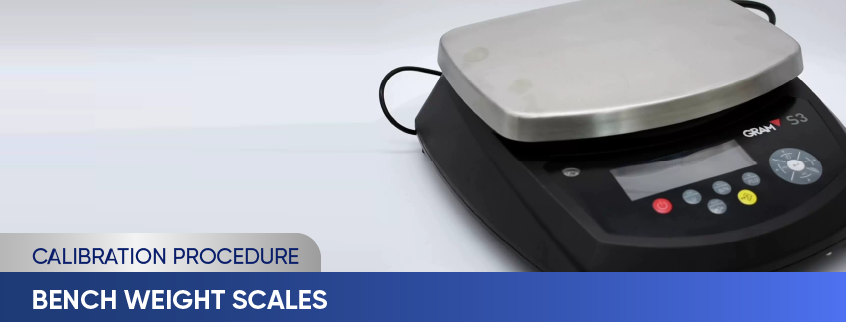
A bench scale is a common type of electronic scale that usually has a maximum weight capacity of 30kg, has a flexible maximum size of about 35x35cm, can be conveniently portable and moved with many uses such as quantitative weighing, Sample counting scales, packaging scales at home, stores, supermarkets, offices, companies, factories, post offices...
1. What are bench weight scales?
Bench Weight Scales have a resolution of <1/1,000 and a maximum weight of 60kg, usually weighing in g. Currently, disc scales are also called common scales because they are very popular in the market. A disc scale is a medium-accuracy non-automatic scale according to OIML R76-2006, including electronic scales, digital indicators, mechanical disc scales, etc.
2. Structure and operating principle
2.1 Structure
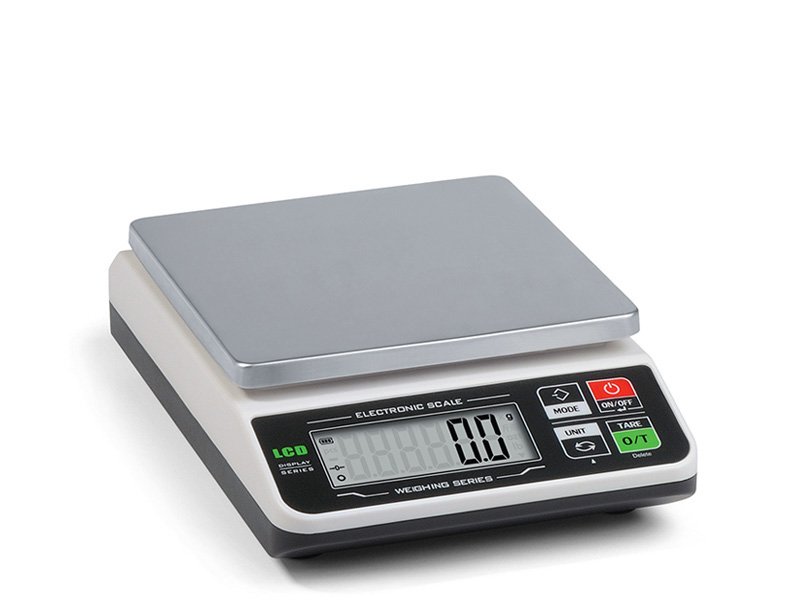
Electronic scales include the following basic components:
- Electronic scale head or indicator: to display the weight value and handle the main functions of the scale such as counting scale, analytical scale, percent scale, tare scale...
- Force sensor or load cell: transmits the scale's signal to the electronic scale head.
Weighing tray or weighing pan: part used to place objects on the scale, usually made of stainless steel or plastic.
Microprocessor: used to convert signals from the load cell, which can be analog or digital signals.
2.1 Operating principle
- The operating principle of an electronic scale is elementary: When you place an object on the scale, the scale will transmit a signal to the microprocessor on the scale head, and the scale head will process the signal and display the corresponding weight...
- The better the quality of the force sensor and electronic scale head, the more stable and accurate the scale will be.
- Each type of scale is designed for different applications, depending on the maximum scale weight, the allowable error will correspond. The larger the maximum weight, the larger the error.
3. Application
- In Industry: Bench scales are used to check the accuracy of manufactured products. Bench scales are used to balance weight during the production process so that the production process is carried out correctly and results in the highest quality products. For example in:
- Textile industry: used to balance weight in the clothing production process, helping to ensure that the amount of material used is reasonable, while also helping to optimize the production process.
- Food industry: Used to measure ingredients in the food production process such as sugar, salt, flour, etc. Helps production recipes be carried out accurately and meet quality requirements of product.
- In agriculture:
- Used to balance weight when carrying goods: Bench scales are used to help farmers balance weight when transferring agricultural products from one place to another. Agricultural products such as vegetables, fruits, livestock, and poultry all need to be measured and checked for weight accuracy to ensure that they are delivered safely and reliably.
- Used to check the accuracy of the measurement process: Bench scales are used to accurately measure the weight of these products to ensure compliance with food safety standards and meet food needs. market demand.
- Use in preserving agricultural products: To ensure that agricultural products are preserved and transferred in the most perfect condition, bench scales are used to measure the weight of agricultural products such as rice, wheat, beans, pepper, ... before packaging and preserving. Ensure product quality and value are not lost after packaging and transportation.
- In Health: Weighing health, weighing luggage for passengers when traveling by plane, weighing newborn babies
4. Why should you calibrate bench scales?
Regular scale calibration performed by a reputable and accredited unit will bring the following benefits:
- Save costs and avoid waste while ensuring output product quality and limiting errors.
- Reliable measurements, ensuring reliable display of final results.
- Comply with periodic calibration to ensure quality for customers and avoid unexpected failures when customers come to inspect and evaluate factories and laboratories.
- Detect equipment deterioration and unexpected errors to make timely adjustments and repairs to ensure final product quality.
5. Calibration procedure
- Standard weight
- Thermometer
- Auxiliary means: pints, gloves,...
- When performing calibration, the following conditions must be met:
- Temperature: at the normal working temperature of the scale according to the manufacturer's regulations
- The influence of external influences (vibration, vibration, wind,...) does not distort the results
- The scale should be calibrated at the site of use.
- The scale must be completely assembled, cleaned, and adjusted for balance. If the scale has a Nivo, the water bubble must be adjusted to the midpoint of the centering line, ready for calibration.
- Gather enough standard weights, specialized test racks, and auxiliary optical disks.
- Temperature stability for precision cable weights E2, F1 and F2 according to the requirements in Table 3 of the technical documents.
- Check the voltage used
- The scale must have all necessary details, parts and accessories
- The indicator must be clear and read accurately
5.4.2 Technical inspection
- The indicator must be clear, easy to read, and avoid confusion when determining weighing results. The keys must work well.
- Start-up load 3 times, starting load level is near Max weight. During the initial loading process, the scale must stabilize for only about 10 seconds and operate normally. If the error is discovered to be too large and with the customer's consent, re-calibrate the scale.
- Check repeatability
- Check accuracy
The measurement of uncertainty (MU) is compiled from the following sources:
- MU of standard weights
- MU due to resolution at point "0"
- MU due to resolution at load level
- MU due to repeatability
- MU due to angular deviation
- MU due to changes in environmental temperature
- After calibration, the bench weight scales are stamped and issued a calibration certificate with the calibration results.
- Recommended calibration cycle: 01 year
To consult and request a quote on our calibration services, please kindly contact us via the following information:
LABORATORY: DONG TAM MEASUREMENT AND TECHNICAL TRADING SERVICE CO., LTD
Address: No.57-59 Street 11, Binh Hung Residential Area, Binh Hung Commune, Binh Chanh District, Ho Chi Minh City
TEL: 028 375 83 869 - Hotline: 0909 347 891 (Mr. Lâm)
Email: info@dongtam-mes.vn
Relative post | Xem tất cả
- Stopwatches calibration
- ORP meter calibration
- Hydrometer calibration
- Analytical and Technical balance calibration
- Analytical and Technical balance verification
- Spring dial scales verification
- Spring dial scales calibration
- Bench weight scale verification
- Platform scales verification
- Platform scales calibration
- Chlorine meter calibration
- Total suspended solids (TSS) meter calibration



 Legal
Legal  Call: 0283.7583869
  Search for Certificate
  Contact